WELCOME
TO THE
OMS
193 Grand Mesa Drive
Ozark, MO 65721
Phone: 417-250-0026
send email

Ozark Mountain Station
The "OMS"
HO Model Train Layout
of Ted Luedke; Ozark, MO
Vintage: late steam
and early diesel - some where in the 1950's :
Santa Fee (ATSF) in the mid west.
If coming from another site, click
HERE
for direct access.
|
WELCOME
|
|
Click below for new progress pages
or you can move from each page to the next with a link at the bottom of each
page.
It is 5/10/2010 and I am just to start my 4th model railroad. I have reloaded some pages from the last railroad so much of what is below does not work and will be removed as I develop this as a new page.
(old links)
November 2004 - Getting Started
June 19, 2005 - Benchwork completed and main line tracks in
October 15, 2005 - Entry door bridge, some service tracks & a bit of scenery formation
March 20, 2006 - Start service tracks & return loop service using buildings for guides
February 27, 2007 - Service areas, fascia, flat care conversion
MMMMM
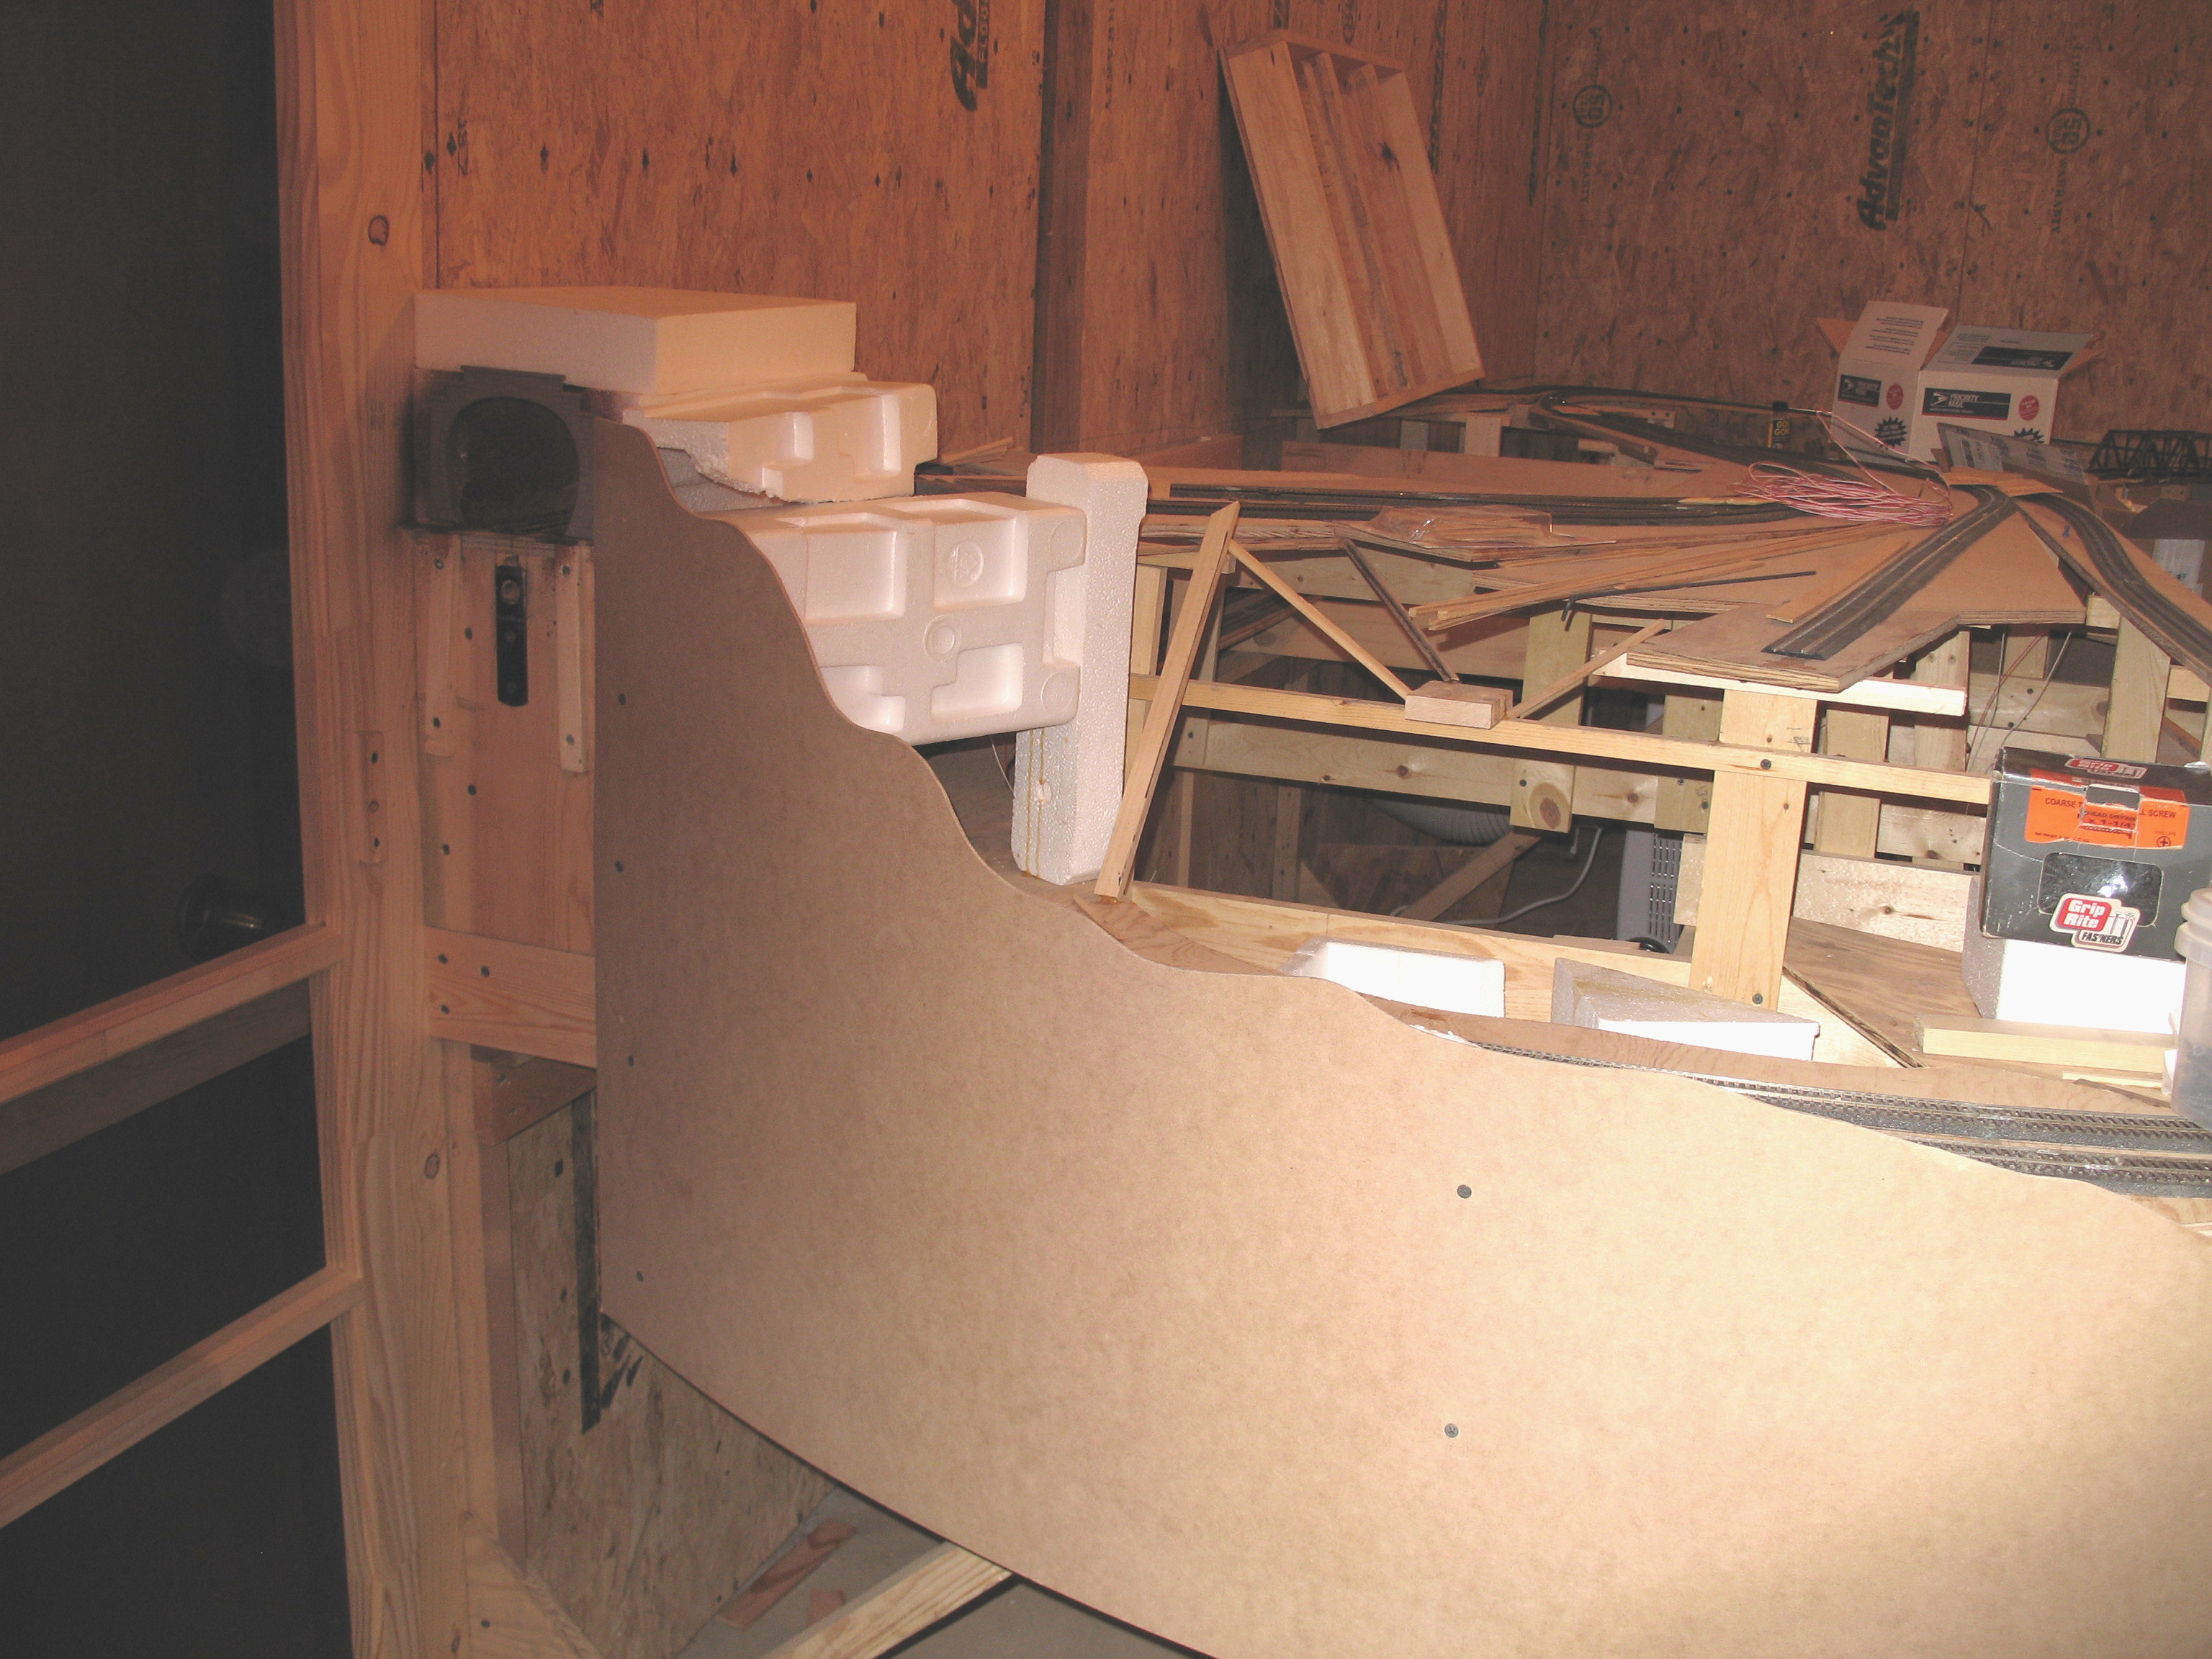
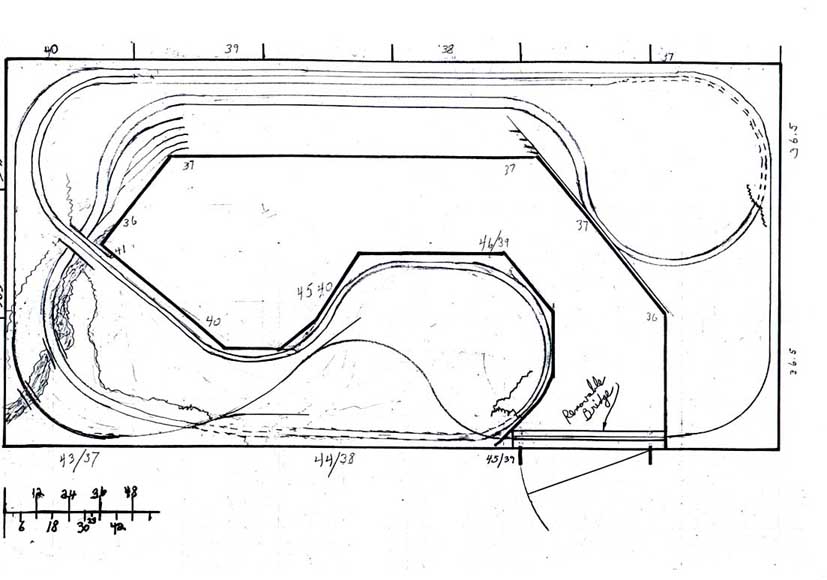
Started in fall 2004, it has an allocated clear space of 12 feet by 24 feet with no windows and one 34" door near one corner. Basic layout is a Dog Bone around the edge of the room with both East and a West main line tracks, several interactive staging yards and a major service and shop yard adjacent to one loop. Bench work is 1x4" joists on 3"x4"/1"x2" L girders, with ribbon and cookie cutter track base of 1/2" finished one side plywood.. The double main line curves are 30" minimum and no curve anywhere less than 24", using #4 and #6 DCC ready turnouts and code 83 brown tie flex track. I choose a full double main so that by myself I could set trains to just run while I actually drive another. While it takes up considerable space, it fits a one man operation out here in the sticks where I live.
This is my fourth railroad. As a young teenager in the 1950's I had two 4x8 sheets of plywood for a simple American Flyer layout in my folks basement. Portable enough that one 4x8 sheet went upstairs under the Christmas tree for a number of years. The second layout was as a father and the first using the grid bench work system and all the electrical blocks for multiple HO train operations of the 1970's. As a grandfather, the third railroad is grid bench work and took me into the new world of DCC, right from the get go. I bought "a bunch" of used Digitrax equipment from a fellow who had a 48 x 20 foot layout in the basement of his now sold home and I was going to install that later, but later never came as we sold the ranch. This fourth layout is grid bench work too and again vintage mid 1950's, following the Santa Fee (ATSF) from the mid west heading west. I have chosen to take scenes I particularly like rather than trace an actual stretch of prototype trackage.
My idea for this web site is to follow along through the stages of development ... from concept to a detail diagram, bench work, track laying and so forth. Digital pictures along the way may be more fun that the words. As I start out it looks like a new page for each stage but time will tell how that idea comes along.
I have been astounded how easy and quick it is to lay road bed and then track. Using Woodland Scenes 20' rolls of road bed and DAP adhesive (clear), it goes quite rapidly. The adhesive is applied sparingly with a caulking gun and smoothed out (very thin) with a putty knife, and roadbed is easily laid along a guide mark I scribe along the cardboard cut outs for curves or a straight line between the curves. I cut half circles of cardboard in 22", 24", 26", 28", 30' 34", 36" and 38" circumference and the width of the roadbed ... using them first to cut plywood sub road bed and then to set up and mark other curves prior to laying roadbed. I can't stress enough how important and easy these cut outs were, to move around to get just the right curve as the area needed, switching from various radii until it was a smooth transition curve to straights. I suggest that others just starting, make there own set of curves right up front and experiment while laying out the sub road bed on the plywood .

Curve Templates
Flex Track was set up the same way, laying a small bead of adhesive on the roadbed with the caulk gun, smoothed with the putty knife and several sections soldered together laid at a time (a must for sweeping, long curves and tunnels). The adhesive holds tight from the get go but allows plenty time for adjustment too. I had the full curve of a reverse loop soldered together and then slipped it through the framework. It takes a little planning but saves a lot of frustration working in and out of bench work and tunnels. This system removes ALL of the drudgery of tacking track bed and tacking track to hold curves, etc. Of course, I solder batches of two sections of code 83 flex track together to facilitate laying track. I cut two or three ties from each end of the flex track for curves and solder together (two ties for straights), cutting the track holding pins from the sections removed and then later gluing then beneath the track to fill the openings. A Dremel with a flat grinding disk works great for precision cutting of the flex track and with a little practice you will not go through as many disks as I did when I started :-) !
I used #12 solid conductor wire (red and white) for power busses and #22 solid conductor wire (red and white bell wire) for the leads to the track. I am wiring leads every 6' maximum. I chose solid red and white because that is what I could get at the local store in both gauges. I have three Power Blocks, labeled A, B and C. I used RDC splices I found on the internet to connect track leads to buss wire rather than try to bare wire and solder. It is working just great but I guess time will tell how it manages over the long haul. I bought a used MRC basic power pack so I could test trackage as it was laid AND get a train running before I got into the DCC ... had to have some fun running my Choo Choo. (Later note: with temporary jumpers I power both mains and yards from this one unit). The first few vintage 1950's locomotives I found (EMD GP7, GP9, F7 and FM in ATSF livery) were NOT DCC ready and I will have to hard wire them when the time comes (not looking forward to this.)
3rd layout just before moving

3rd layout Plan
So, we start into layout number 4
Early September 2009
Katy & Ted - Box LT Ranch
193 Grand Mesa Dr
Ozark, MO 65721
Ted
Cell 417-250-0026; Katy 417-250-0027
First Copyright 2006; All rights reserved by the Box LT Ranch and
BLT Publishing
Created : 10/26/2006. Update : 5/10/2010
Katy Kreations
RV On The Road
Ozark Home
Marines
Speak Out Publishing
Sales
Ranch Info Favorite Links
Leave the site for these Marine sites
(but come back please):
Marine Corps League National
MCL Springfield, MO
Together We Served -
Marines Only